This first tutorial goes through the process of creating a fur and groom using peregrine labs Yeti plugin for Maya. I am describing step for step how to go about setting it all up.
In this second tutorial i explain how to make your fur system clump when you have a groom attatched.
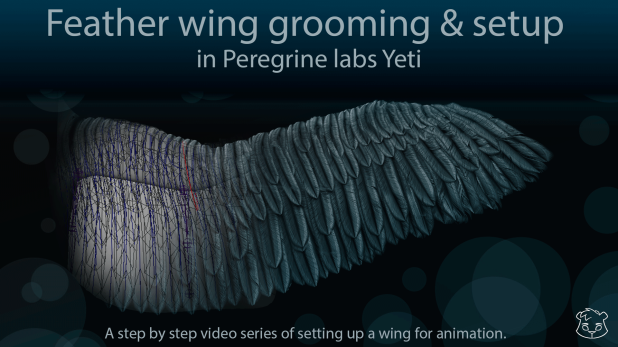
I created a simple and straight to the point tutorial series on making a feathery wing.
Check out the details below:
Basic walk through of a few nodes:
This tutorial goes through instancing and creating a feather coat:
This tutorial shows how you can set bounding objects to control of fur should grow or not:
This tutorial goes into controlling a groom through a texture map:
This tutorial goes through setting up your simulation:
This is how to export and import a groom in Yeti
This tutorial explains how to control your hair with a guide curve while animating the mesh.
This tutorial explains how to apply a texture map to a shader and then apply the shader to the yeti node “the fur”.
I also show the settings i usually play with when using V-Ray as my render engine.
This old tutorial was brought back due to a request, it shows how to cache your yeti simulation out.

Hello! Great thank you for tutorials! I have a question, may be you help me – may i use geometry as clipping mask to groom. Illustrate of my idea – http://shot.qip.ru/00oBzR-63YtCRCQg/
I mean lenght
Hmm, I havent tried but I believe that you can just use the geo as a bounding object and that should clip your fur off where it intersects.
if you can script, xgen seems amazing, i don’t see whats the advantage of yeti or shave over xgen, IF you can script very basic things. ill admit i have only demoed shave and yeti but I’m looking into them. If someone could enlighten my confusion I’d appreciate it!
Another huge advantage for indies is that with xgen i can render out on a gpu render farm. I’m talking like many thousands of hair rendering in seconds per frame. <2.5 seconds
Hi! I just tried a simple yeti hair on sphere and it was rendered well in Arnold mtoA!
but when i animate the sphere, hairs are not following the mesh,its just simply in same place without following on sphere! .
there is any steps i missed to attached the hair with mesh????
Thanks
Mani I think you need to create a reference node.
Great! Thanx 🙂
Hi Bjorn,
I was wondering if it is possible to get interpolation among groom guides? currently I have combed the groom guides but If I add new ones the they are all pointing straight.
Hi Rocky, there is a smooth tool in the groom tools, you can use it to smooth your guides so that they each inherit a bit of position from each other. Or you can go into component mode and do it the hard way.
Hi,
How to achieve a long type “Braid” hair styles in Yeti, maya nHair have default braid option, but how to bring it to yeti !@#!?
any suggestion pls !!
Thanks
Hi Mani, I would use curves for long hairstyles and simply braid the curves.
these tutorial are Really Nice i have downloaded all of them.Thank you
Hi, Thanks a lot for these tutorial.
Question on instances: How to bend them, or randomly, or based on external factors ?
Found it ! Instance / Distort.
Hi again !
I have an issue that when the main object is moving, the groom is detaching from the object. What did I forget ?
You can see the behaviour I am talking about on: https://www.youtube.com/watch?v=RXpdGyewDzQ
Thank you.
hi,first of all thanks a lot for your help.could you please make a video about displacement node. there are no any enough details even in the
documentation…hop to see you again.thanks…
I wish the feather tutorial was more complete. For a beginner, it is very helpful but what comes after the creation of poly feather? How do we add the feather texture and make it look real?
Hi, I just started working on a feather tutorial. Stay tuned!
Hi, thank you for making these amazing yeti tutorials. I was wondering if you know any tips on transfering the character uv map to the feather coat instances? When I render a feather coat every feather has the same uv? It would be cool to mix the individual feather maps with the body color map.
HI Tom, I am looking in to that these days. I don’t know right now.
thank you so much for the reply. I tried using the aihair shader on the yeti instance to see if I could get the feather coat to render and grab the u and v paramcoords of the body much like the yeti fur does. It didn’t seem to work. I’ll keep trying.
Hi tom ,iam new to yeti and i find difficulty to attain fur texture from paramcords of the body.i have connected the body texture into root and tip color but the result is regular hair.please help me with the procedure.
Thankyou
Hi Bjorn, first of all, thanks for this amazing tuts 🙂
I’m totall desperated just trying to render the fur or hair. I usually use Vray, but its not working in mental either.
I added in Maya.env these lines:
MAYA_MODULE_PATH = C:\Yeti-v1.3.18_Maya2015-windows64;
MTOA_EXTENSIONS_PATH = C:\Yeti-v1.3.18_Maya2015-windows64\plug-ins;
MTOA_PROCEDURAL_PATH = C:\Yeti-v1.3.18_Maya2015-windows64\bin;
PEREGRINEL_LICENSE = C:\rlm\yeti.lic;
VRAY_FOR_MAYA2015_PLUGINS_x64 = C:\Yeti-v1.3.18_Maya2015-windows64\bin;
VRAY_PLUGINS_x64 = C:\Yeti-v1.3.18_Maya2015-windows64\bin;
Is it fine? Am i missing something?…
thanks again !!
You are missing something from VRAY_FOR_MAYA2015_PLUGINS_x64. You need to have the path of vray plugins in maya in it.
My Maya is installed on D:\ – change it to the path of your install folder
D:\Program Files\Autodesk\Maya2015\vray/vrayplugins;C:\Yeti-v1.3.18_Maya2015-windows64\bin
Hi Bjorn, first of all, thanks for these awesome yeti tuts!
I’m trying to render the fur or hair with VRay or Mental… with no luck. I added these lines to the Maya.env
MAYA_MODULE_PATH = C:\Yeti-v1.3.18_Maya2015-windows64;
MTOA_EXTENSIONS_PATH = C:\Yeti-v1.3.18_Maya2015-windows64\plug-ins;
MTOA_PROCEDURAL_PATH = C:\Yeti-v1.3.18_Maya2015-windows64\bin;
PEREGRINEL_LICENSE = C:\rlm\yeti.lic;
VRAY_FOR_MAYA2015_PLUGINS_x64 = C:\Yeti-v1.3.18_Maya2015-windows64\bin;
VRAY_PLUGINS_x64 = C:\Yeti-v1.3.18_Maya2015-windows64\bin;
Am I missing something? is it neccesary to setup vray in a specific way or add any specific material to hair? I already tried following your “Shading with Vray in Yeti” but doesn’t talk about instalattion issues.
I also tried adding VRay Hair to the Yeti node in the outliner, but didn’t work either.
Well, thanks again, hope anyone can help me 🙂
Although it’s a poor guide http://peregrinelabs-deploy.s3.amazonaws.com/Documentation/Yeti/1.2.6/installation.html lets you know approximately what to do. I current,y work with Arnold so I don’t have much experience installing it with V-Ray. I had a tech department for that last time. 🙂
One thing it could be though, if you have set your paths right, is that your yeti version is not compatible with your V-Ray version, try to update or downgrade either version to see if you get results.
Finally, thing was I had to modify the environment variables of windows to make VRay properly recognize Yeti… Thanks anyway!!
(Chaos Group or Peregrine Labs should definitely make better tutorials about this…..)
what did you change to get it works ?
Hi Bjorn
I’ve been working on fur for a hyena using Arnold as renderer. I can’t seem to get the colour map working. The colour maps are tiff images and i plug them into the Diffuse Root Colour, Tip Colour and Specular Colour Channels of Arnold’s hair shader. Is this the correct way of adding colour maps for fur?
I would pipe the texture map into the tip and root colour as well as spec1 and 2. Try that and see what you get.
This helped me the problem you’re having, the part about texture mapping.
https://support.solidangle.com/display/AFMUG/Hair+-+Diffuse
Hi Bjorn! Thanks alot for these great tutorials! They are nice and short and right to the point. I was wondering if I might get some advice?
I am having a bit of trouble mapping a texture to use as a scatter density mask. I have an object that has multiple UV tiles (UDIM 1001, 1002, 1011, 1012, 1013). When I plug in the texture from the 1001 position Yeti scatters in the 1001 space (like it is supposed to) but also the 1002 space. The 1-11, 1012, 1013 spaces are clear. I am using the U coordinate $s and V coordinate1.0-$t. Do you have any tips on working with multi-UDIM textures with Yeti?
Thanks again Bjorn!
Chris
Hi Chris
I’m a little stuck too on multi tile UDIM, did you ever figure this out?
Thanks
Rebecca
Hi Bjorn,
Thanks for your tutorials, they are great. I was wondering if there is a way to use guide curves in conjunction with the comb node. What I want to do is use guide curves first to block out the main shape of the fur, and then use a comb node to tweak and refine it further. Is this possible? Or do you have to use one or the other?
Thanks.
I think its a case of one or the other for the time being.
Hi Lauren,
I’ve done something similar in the past.
I’ll create my rough guide shape using the maya curve tools….then you can convert the original curve(guide) to a groom once you get the rough shape and use the comb tools to modify and tweak it further using pgYetiConvertGuideSetToGroom
hi can i use yeti with mentalray renderer?
No, you can’t use that renderer.
Hi guys.
I want to render yeti with Arnold.but when i tried to render a scene that have yeti, render view render nothing. and it fill with blue (that blue screen when render starts all the time) and Maya didn’t crash.just render finish with 0 or 1 second render time.( scenes without yeti hair rendered well.)
I using :
Maya 2015
C:\Yeti-v1.3.18_Maya2015-windows64
MtoA 1.1.2.1
Arnold Core 4.2.2.0
and set/edit these system environment variables:
MAYA_MODULE_PATH=C:\Yeti-v1.3.18_Maya2015-windows64;
MTOA_EXTENSIONS_PATH=C:\Yeti-v1.3.18_Maya2015-windows64\plug-ins
MTOA_PROCEDURAL_PATH=C:\Yeti-v1.3.18_Maya2015-windows64\bin
PATH=C:\Yeti-v1.3.18_Maya2015-windows64\bin
and I edited pgYetiMaya.mod Like below:
+ pgYetiMaya 1.3.18 C:\Yeti-v1.3.18_Maya2015-windows64
I read that you, blaabjergb, wrote that you work with arnold. I will be happy if you can help me any way. I really need to solve this soon.
(sorry for my poor english.)
thank you blaabjergb and you all.
I waiting for any help…
Hi, try to go to the diagnostics tab of your Arnold render settings and check off Abort on Error, this should give you some kind of image.
thanks blaabjergb. I’ll try that.
yeah i work. actually it rendered the head, but still not the hair.
i add a width node to yeti ( heard from someone this is the problem) but not any hair yet.
do you know some next steps that i can try them.
thanks 🙂
Hi! Did you find any solution? A have the same problem now. I unchecked “Abort on Error” and it’s rendering well, but there aren’t any hair
thanks for the nice tutors. Can you please advice on how to apply textures to feathers generated by pgYetiFeather..
It’s not super straight forward but there is a good thread on it here:
http://yeticentral.com/viewtopic.php?f=5&t=660&p=3250&hilit=feather+texture#p3250
You need to create a texture file with your texture and then plug a aiUserDataFloat into the uvcordsX and Y, one userdata should hold the attribute surf_s and the other one surf_t as s and t, its like the UV coordinates for the feather in Yeti. You then apply the hair shader ‘with the aiImage file plugged into colour’ to the yeti node with the feathers. Also make sure to create a shader node at the end of your yeti tree. There is an example file on yeticentral you can download from Carlogiesa that’s a setup of just this.
Thanks a lot for the help man. Will check it out 🙂
hi , Just tested it . I am able to get the colors for the feathers from the texture on the yeti node. What i am looking for is a bit different. Like assigning individual textures to multiple feather nodes. Can you pls explain that ?
Hi, Do you know how to populate the entire mesh, I have some holes on my fur.

Is there a setting for that ? I’m using curves as guides.

Thx for your help 😉
Zup Pitiwazoupitiwazou!?
When you groom it check off the populate at mesh points to place strands in the middle of polys etc.
If you are not using a groom you might want to paint density maps for your scatter.
I have a tutorial on how to use maps with Yeti if you are interested, just scroll up. 🙂
Bjorn
Hi, I found a way ton control the clump size with a map, I wonder if you have a better solution because it’s not as good as I would like.

Nope, it looks like you are on the right track, I would just refine the map a bit more. Make sure to use a 16 or 32 bit map.
Ok thx 😉
Another question, i’m trying to convert a guide set to a groom with a mel, but it dosn’t work, have you the good mel to do that ?
I only know a little python, not mel.
Thx for your help 😉
Great tutorials. !! Thx.
Hi Bjorn,
Thanks for tutorial. Do you know the script for adding node inside the yeti graph, like scatter or grow. And script to connect them. In the scripting documentation its only tell for query and edit.
thanks 🙂
Let me get back to you on this. I will try to have a look if I get the time.
Hi,
Can u do a small tutorial on how to drive yeti groom with nhair?
Hmm I already did, but it’s in my payed tutorial about feathers.
You just need to use maya curves as guide curves for your groom. Making the maya curves dynamic will then give you maya simulated curves that drive your hair/fur/instance.
yes I have done exactly that.. however when I press play, I can only see my dynamic curves simulate while the yeti fur remains static.
Can I send you my test scene if possible?
Hi there !
Got a question. 🙂 I want to add eyebrows/eyelashes/beard to my character that have already a yeti node attached and a groom for the hair. What would be the best approach to achieve that ? The idea is the eyebrows/eyelashes/beard have a different width,length, etc. I add another groom node ? I’m new to Yeti. Thanks in advance !
Hi Alvaro,
I would use a seperate groom/yeti node for that.
Hi there.
Thanks for the reply. I will give it a go !
Hi, for an animation, we have humans turning into animals….do you know how to grow hair length in the animation? where to set up keys in yeti?
like at first they have no facial hair and short hairs, and couple frames later they have short hairs all around the face and long hairs?
Thanks in advance!! 🙂
Hi Xavier,
You can right click on any yeti attribute and set a key, this means that you can key the length attribute if you want. You can also animate a length map if you want.
Hi, thanks a lot for the quick reply, I’m not entirely sure to understand exactly WHERE to put the keys, it is not in the node tree. I do not know really how to give a key to a paint effect (clumping, length, etc..). All i found was in the yetihairnode “attributes” under display/render i could change render length. need to find where to plug length map….anyway thanks a lot, at least I already know it IS possible to do it! 🙂
you can key in the attribute editor, the length of fur in ‘render’. But its actually breaking when I launch renders on farm. It get stock to one key position and dont animate (stay full fur or no fur or half fur but doesnt follow the animation curve, even baked)
. Anyone ?
Hi there!
Now I have a problem for Maya 2014.I can’t “Loaded pgYetiMaya”
This is my maya environment.
Thank you
Hi, I have a little issue with my model, when I add a blendshape, the groom don’t follow the mesh correcly.

Even with the groom added after the blendshape and also only on the vertex.
Have you seen this and know how to fix it ?
Thx for your help again 😉
I found it by creating a texture reference ^^
You got it!
Hi, Sorry to ask you again, but I have a little question.
2- when converting curves to groom, I have not the good result when I use a comb brush.
Also, How can I have a better result when I use guides curves instead of groom. I don’t know if yeti has an interpolation mode.
http://i.imgur.com/IFYFDim.gifv
Thx for your help 😉
Hi Bjorn,
Grate tutorials im having problems importing the fur on to an alembic animation iv try’d to import it thru the I/O as you explained in your export and import tute but when i do the fur seems to go crazy any advice would be greatly appreciated.
https://docs.google.com/document/d/1i6BI7jUzcKcWAVzqgr5EZZmIHHINmNo49g-w276Q3oQ/pub
Hi Born, firstly brilliant tutorials, thank you for your time making them. My question is regrading instancing in Yeti – is there a way of randomising values in a node (such as the transform node) so that leaves / feathers etc…. could be rotated around an axis randomly on a per leaf basis? Thanks!!!
Hi Andy,
You should be able to, although it’s some time since I did it.
You should be able to use a rand Mel command to create a random number within a range of your choosing. Rand[]
Hi grate tutorials.
Im trying to connect a fur groom to an alembic cache i try’d to do it the way you did it your tutorial but when i import the groom the fur explodes any ideas on what im doing wrong?
Hi , first thank you for all your tutorial !! really helpfull ! i have a problem that seems recurent about texture pattern on feather.. after hours to try differents methode with the parent_t & s in a aiuserdatafloat i still not understand the way to “project” my entire texture from the mesh source to the feather and not have only one color by feather… Something like the fido example http://renderman.pixar.com/view/fido or maybe there a different way to texture a bird with yeti?
Hey Bjorn,
thx a lot for your tutorials on Yeti. They were very helpful and saved me from going insane on the project I’m working on. I’m certainly gonna come back and check out the other tutorials you maden.
Keep up the god work.
Cheers
Fabian
Hey Bjorn,
Thanks a lot for your tutorials on Yeti.
I having a problem while adding texture node, as soon as I add texture node this error is coming (// Error: [Thu Oct 22 17:31:13 2015] Yeti 1.3.17: ERROR Ivalid texture texture request D:/test3.TIF …) I tried to use .jpg and psd also
Please advice would be greatly appreciated.
Thanking you
Prashant
hi,
I am using yeti 1.3.17
when I add texture node following error coming ( ERROR Ivalid texture texture request D:/test3.tif )
I tried to use other format also like .jpg .psd, but same error is coming.
please guide me how to solve the issue.
Thanking you
Prashant Sadaphule
Hi Sadaphule,
It must be unable to find the texture file that you are leading it to. Double check that the path is all right, or try a different location to see if it makes a difference. I hope you make it work.
Bjorn
thank you very much for reply.
I tried for different location also but same error is coming.
even I open yeti sample file there also same error is coming.
Hi !
I had the same problem and I struggled a lot before understanding the origine of the problem.
What I discovered is that the “test_texture” in “Yeti v###-> examples” didn’t work in the file “yeti textureExample” for the first groom test but worked for the second one, and, strangely, after putting the second one it worked for the first one” (I don’t remember if I changed things.
After that I discovered that the test_texture worked in other files, so I put my own texture on it in photoshop and save a copy and it worked and another copy didn’t work. the only difference was that one was “texture.tif” and the other “texture.TIF”.
Now, I can work with all “.tif” I want, but any “.TIF”. That sounds very strange I know but maybe it’ll help.
Hi everybody !
Because I had two problem on Yeti (and I’m new in Maya) I had two problem that made me pulled my real hair with a very basic solution (so that made me even more crazy).
Anyway, the first one is about the pink brush that I didn’t have in my viewport (just a pencil) so I wasn’t able to work well, the answer is simple : I was in viewport 2.0 so I toggled to Legacy Default Viewport and it works now.
The second problem was about the component mode, I wasn’t able to pull the hair (the 3D hair now) or move it, the answer is simple also, I was still in symmetry in my move tool !
I’ve lost few hours understanding those, I hope it will save other people the same amount of time 🙂
Thank you for sharing!
Hey guys !

Still on my character, having again problems (haha).
Basically I try to achieve a cartoonish style of this hair style :
mixed with : https://s-media-cache-ak0.pinimg.com/236x/df/fb/72/dffb72896275388349bb79e86a832fc0.jpg (planet treasure)
So I have three Yeti, one for the very short hair, one for the long hair and one for 2/3 hair lock on the front.
For the long hair, I work with a comb and a bend, and I have something like this : http://www.hostingpics.net/viewer.php?id=132731pbhair.jpg
I see two problems, It does not look like block at all, and they have the same lenght.
Do you have ideas of how I can fix this ?
hello, first of all thanks for the tutorials, they have been a great help, now, i have a few issues.
sometimes when i’m rendering the hair looks cut off,l like a black square has been put in front of my hair. is not leght or anything is like is out of the shoot, like when the clipping in the camera isn’t enough, except this time is not the camera, because it used to work just fine.
and the blend node doesn’t work at all. i’m working with 1.3.18 version for maya 2015.
please help!!!!!
Hi, I’m trying to control the width of a node with a Grey scale map. I imported the texture, add the attribute ”width”, and changed the UV thing. Then I typed in ”$width” on the width multiplier but the hairs just disappear… Can’t I control the width with a map like a did for the length and density? Am I doing something wrong?
Hi Bjorn
Love the tutorials. I’m only new to Yeti so this might be a bit of a noob question but I was hoping that you or someone else may have an answer for me.
I have a character that has long hair/ fur and has multi coloured bands going around him. Is it possible to have each yeti hair strand have different colour bands and if so how can I achieve this?
Hi Bjorn,
Love the Yeti Tutorials man, Keep it up.
Hi Bjorn, Ty for your ONLY yeti tutorial 🙂
i have a problem, when i want create a clumping node !
this is my error :
[Sat Dec 12 15:53:56 2015] Yeti 2.0.8: ( clumping in pgYetiMaya1Shape ) No fibres found in second input, clumping will be ignored.
anyone know , what is my wrong ?
You must convert your guides to fibres before you connect it to the clumping node in that case.
TY. Solved. 😀
i have the same problem i followed your tutorial step by step but still i get this error message and clumping just dont work what am i doing wrong
but in this case i cant paint the heat map
How do I paste a jpeg file in my comment?
Hi Bjorn, I was wondering if you do on-demand tutorial/teaching (paid or not) ? Its have been some month now that I’m trying to achieve a certain fur from a movie without any success, there is not any tutorial on yeti/xgen that cover a deep example of a complete cartoon character, and I’m starting to think that trying to do a fur without any professional knowledge is time wasting.
Thanks for the reply !
Hi Epixerion,
Grooming can have a quite steep learning curve for sure. I am pretty busy the year out and I don’t teach remotely as of now. It’s true, most of my tutorials are fairly theoretical, I would love to do a tutorial going from start to finish on grooming a creature. Maybe I will do that at some point.
I am sure you will get better and better if you keep at it, but of course, it’s always quicker to have someone to ask. 🙂
I am sorry that I can’t be of more help to you right now, I hope that you find a solution.
Bjorn
Thanks anyway, I’m just starting to desperate because its been 2 year now i’m trying to play with maya fur, xgen and yeti and not getting any better result since my first groom ever, could I ask if you have some contact that could give me some tips ? I was on the point of paying for a workshop on cgsociety (the wolf), its cost 600$ and i’m not even sure it will cover thing that I want to learn, I would ratter spend that money with someone that could give me some specific tips if you know what I mean.
Thanks,
Epixerion.
Hi Bjorn, I tried to copy this method of method of creating a realistic groom, https://www.youtube.com/watch?v=D5LHfjVPGP0, but I’m unable to mimic it because the number of scattered points are low when the scatter multiplier is set at 1 and when I use the clump node, the hair doesn’t clump. Please help me!