This first tutorial goes through the process of creating a fur and groom using peregrine labs Yeti plugin for Maya. I am describing step for step how to go about setting it all up.
In this second tutorial i explain how to make your fur system clump when you have a groom attatched.
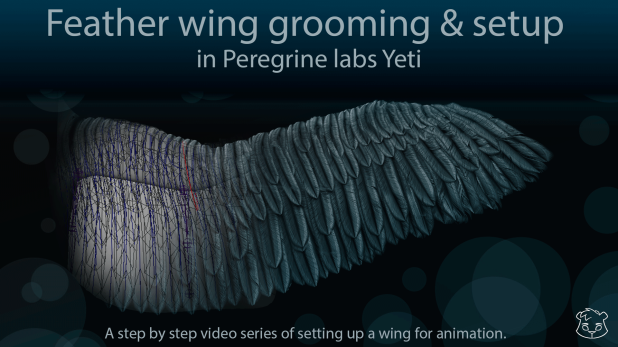
I created a simple and straight to the point tutorial series on making a feathery wing.
Check out the details below:
Basic walk through of a few nodes:
This tutorial goes through instancing and creating a feather coat:
This tutorial shows how you can set bounding objects to control of fur should grow or not:
This tutorial goes into controlling a groom through a texture map:
This tutorial goes through setting up your simulation:
This is how to export and import a groom in Yeti
This tutorial explains how to control your hair with a guide curve while animating the mesh.
This tutorial explains how to apply a texture map to a shader and then apply the shader to the yeti node “the fur”.
I also show the settings i usually play with when using V-Ray as my render engine.
This old tutorial was brought back due to a request, it shows how to cache your yeti simulation out.

I’m not getting any answers!
Hi Robert, bussy times I am affraid. If you log on to yeticentral.com there is usually someone skilled ready to chip in with guidance at short notice.
In there you can also upload a .ma file. That makes it much easier to trouble shoot. I can’t tell why your clumping node doesn’t work, but if you feel that your groom is too thin then you need to increase the scatter multiplier. If the clump node does not work then you might need to convert your strands to fibers with the convert node.
My account could not be activated.
Hi Bjorn.
Thank you so much for going to the trouble of creating these tutorials. There aren’t many resources out there for Yeti and these have helped me a lot.
I’m currently doing a character with varying hair lengths and am using curves exported from zbrush fibermesh.
I was wondering if you knew of a way to control the hair length from the curve length?
using a groom or texture map to drive the lengths is becoming quite time consuming and i was hoping the curve information could help.
Thanks
Hi Alfredo,
If you have some curves you can use those as guide curves. Just create a set with them in it and add those to your yeti node under guide curve set. Yea maps can be a pain to get right.
Thanks Bjorn.
I was using the curves as guide curves but didn’t have it hooked up to the grow node in the right order so it wasn’t controlling the length.
This seems to have worked.
Thanks again!
//s.imgur.com/min/embed.js
Hi bjorn,
i have some problem to attain hair texture from the body texture in yeti.Iam using arnold hair shader and i have mapped the texture in hair and root color but hair remains same in render.its a repeated question but i dint find a clear answer in the previous ones,hope you can help me.
thankyou
Hi. there!
sorry for my poor english. I’m from far east.
when I trying to render yeti fur include velocity element with maya2015 & vray 3.xx.
maya shows this message
// Error: line 1: Exception [module=1] : Rendering region (576,256)-(640,320) //
// Error: Cannot write output image file “D:/typee/images/tmp/velo_test.exr” //
// Error: There was a fatal error rendering the scene. //
how can I fix this?
maya 2013 & vray is fine.
You can’t render velocity pass with yeti, take off this pass , if you wanned this for blur, you have to make 3D blur
Hi bjorn,thank you for making these yeti tutorials. I’ve problem with Guide Curves. I use Yeti 2 with maya 2016, the code don’t work :
import maya.cmds as cmds
baseattr = 4.0
for element in cmds.ls(sl=True):
attr = cmds.listRelatives(element, s=True)
cmds.setAttr( (attr[0] + “.outerRadius”),baseattr)
the error is this:
# Error: expected an indented block
Where am I wrong?
bye
you need to type space four times before attr=… and cmds.setAttr…
Thank you very much 😉
HI Bjorn! Do you know how to go about getting the uv color map of the object to render on the feather instance cards?
Here are the problems I mentioned earlier about low scatter points and clumping issue.
These are grooms.
The scatter points here are increased.
This is the video I tried to copy the method from.
Hello,
First of all, thank you for all your yeti tuts. It was a really solid base to start learning.
I manage to make a rat fur with it now, but I’m now stuck with a simple (I guess) pipeline problem… I’ve asked on forum, but I didn’t get any answer by now… So I take my chance here.
Basicly, I have my Model with fur on It. My friend rigged it and animated it. I’ve exported/imported the model reference, reconnected attribute, import groom cache, the groom form yeti node. But here come the probleme. I made my fur on a model scale at 1. After the animation, the model is scaled à at 0.1… So the groom become giant and has nothing to do with my initial groom…
I can’t find a way to scale it properly… Tried the Render Lenght and Width, or a scale… But nothing work…
So I’m here, humbly asking for any clue. 🙂
Thank you in advance for your time.
Here an image to explain the problem : https://www.dropbox.com/s/hpeh9u7e496hnks/Rats.jpg?dl=0
Hi Manuel,
While scaling is a nice freedom in some scenarios it tends to be problematic when it comes to grooms.
I suggest that you scale the scene in stead of the character.
Whenever we have to scale models where I work, we always redo the groom, which is why we almost never scale the models or rigs, but make sure from the beginning that it’s the right size.
If we do scale them it’s typically only by 10%, if you scale it 90% then I don’t think any quick trick can save you… other than scaling the scene/set in stead.
Bjorn
Thank you so much for your answer Bjorn. However my fears come true… Problem is that we use it for some crowd simulation and the size is dependant to the simulation. I’ll see with the FX person in order to scale the scene and fix the problem so. 🙂
Without imposing, I would like to ask an other question about simulation (basic, not yeti simulation) that maybe you could know…
Let say we have a simulation of 200 rats.. Is there a way to assign the fur without selecting them one by one and import my groom ?
We try to place the rat with fur in the simulation instancer, but Yeti seems to not like being instanced and crash… The Yeti doc for duplicating fur in simulation is almost non-existant so…
Thank you so much again for your time and the answer you gave me. You rock. Have a nice day.
Hey there!
Thanks for the great tuts! Just wondered if you might be able to answer a question…….I’m using Arnold to render a scene and everything seems just fine grooming-wise etc, but when I try to render it says: Error (groomnode0) is missing an attribute; and stops. This is vague enough that I’m unsure how to procede.
If you any idea what this error means, I’d be grateful if you let me know!
Cheers!
I haven’t had that error myself, but check your groom node connections and see if you deleted or changed an attribute to something it can’t find or regonize. Try comparing it to a brand new groom node and see if you can find out what’s different.
Can you post a pic of your Yeti Graph ? And the window when you double clic on the groom node ? I can try checking if you want to.
Hi everyone, and thanks for all helpful stuff Bjorn!
I’ve been playing with Yeti feathers recently and I was wondering if there’s a way to texture a feather as I would do it with a simple plane.
I am rendering it with Arnold, and what I’ve tried is to type feather_param into aiHair’s U Param and V Param but no luck, just getting weird mirrored result. Guess I am doing something wrong. Thanks!
Hi, does anyone know does airfield works with yeti? for some reason nothing is happening then i add airfield as a force, all other forces are working fine?
thx
Hi ! Thank you so much for your tutorials , it has helped me a lot.
I’m dealing with yeti simulation right now and I have some issues with kind of lateness. When my character is moving ( not that fast !) the groom doesn’t seem to be able to follow the mesh and it gets one or two frame behind (displaying a straigt line in the viewport) I tried to change every atributs, and nothing can fix this (even iterations.) Have you ever got that issue ? Do you know how to deal with it ?
Make sure you have a texture reference object for your geometry.
Hello:
Thank you very much for the tutorials
How i can to texture a feather in Yeti ?
I need to texture like a colour feather in this link
http://on-theedge.blogspot.cl/2010/11/color-texture-and-pattern-revisited.html
Can somebody help me?
Thanks
This is the perfect website for everyone who would like to find out about
this topic. You know so much its almost hard to argue with you (not that I really will need to…HaHa).
You certainly put a brand new spin on a subject that’s
been written about for ages. Great stuff, just great!
Please help me! I get this message whenever I use the clumping node. “( clumping0 in pgYetiMaya1Shape ) No fibres found in second input, clumping will be ignored.”.
Hello, everyone
i have the same question which Mr. Eduardo mentioned.
How i can to texture a feather in Yeti ?
and how can i render in Arnold ?
Regards,
my renders flicker using arnold , how can i fix that ? thanks
Crank up the camera samples for Arnold, or check your light samples. A decent fix may be to use a de-noise node in Nuke when comping it.
thank you , i just noticed that using scraggle node is what makes hair move , i dont know why that but hairs move and flicker in render , also using a udim tag in texture node causes a motion blur problem i dont know how to solve this , so hope you can help me if you are free . thank you
something else are feathers i have a problem scattering two different kinds of feather geos , and the second problem is that i cannot map them , any one can share please if you know .
Hi,I got some problem when I tried to use Maya nHair system to simulation pgYetiMaya.
I used blendshape to influence Yeit’s guideCurves(I use guideCurveSet, not Grooms)than influence my hair.
My hair would tremble even though the model didn’t move.(If the model moves even worse…)
I already tried adjust Tip Attraction to 1,Base Attraction to 1,Weight to 10 but still trembling…and the hairstyle will change. completely different style.
My friend told me that save guides rest position would do but I don’t actually know how to do.
Hope you can help me out. Thx!!!
Sometimes that happens, check your collission thickness. The dynamic strands may be reacting to something they can’t escape.
Thank you! I use “paint vertex properties””Thickness” to fix this problem!
I don’t know.sorry
I’m new to setting up fur. I’m wondering, could you make any general comments regarding Yeti and Xgen. For example, where is one stronger than the other…which is more robust…also which plays nicer with Renderman? Would you say Xgen is now at the level of Yeti? I know, “it depends”, but but if you could glean any general info that would be really helpful. Thanks.
I find that it’s a matter of taste at this point, because you can do great things with both. I personally use XGen these days, because it works across machines without the need for extra plugins. Of course at work we have our own proprietary tools.
Both systems, Xgen and yeti requires a certain pipeline to work, so you basically need to know both to be able to make your own choice on which is better. Technically they both do a great job. I will say though, that dynamics and simulations seem more controlled in Yeti than in XGen, since in XGen you rely on Maya dynamics and your scene fills up with more nodes, nucleus and stuff. On the bright side XGen is a part of Maya, and you can use familiar tools to control the groom or hair dynamics.
Whichever you pick is really a matter of taste. I find that XGen is a bit more messy in terms of files saved here and there, but they both yield nice results and good previews.
Thanks for your reply. Much appreciated. How about performance-wise..both interactive and rendering. I’ve found Xgen to be pretty slow in viewport on my machine dual 14-core xeon with a 980ti card. rendering is also kind of slow. other issues i’ve seen so far is fur not wanting to follow the geo around, it seems to “lag” behind…so geo hides fur in some cases. This is with Xgen, no experience with Yeti yet. Thanks.
Hi,i am janakiram from india,i would like to know how to add texture and shading for yati default feathers,i really like the yati feather system
pls,upload a tutorial.
Thank you.
Hello there,
Thanks for the great tuts for the basics. Really helpfull.
I may have one quick tip for batch tweaking attributes without using script (I’m not sure if it has been posted before so feel free to delete that post if useless) :
Open the Attribute Spreadsheet in Windows > General Editors.
Select all the curves you want to modify. Press the ‘Down’ arrow on your keyboard in order to switch the selection to the underlying shape nodes.
In the Attribute Spreadsheet, go to the ‘All’ tab and scroll all the way at the end.
Now you can select values per curve, select multiple ones or apply the values to the entire set by clicking the name of the attribute at the top of each column.
Hope that helps.
hello,
I just want to thanks you for your tutorials, they help me a lot 🙂 !
hey man, wonderful tutorials, I`ve learn a lot about them, but I don`t know what im doing wrong, i get diferent fur shapes and even no fur calculation at all, when lock density is cheked and when is not, so is there any other parameter that could help me with it, really frustrating because one render and it looks awsome, second render without tweaking anything and no fur! 😦
Hi dear Bjorn
I have a very big Problem with yeti rendering. I use arnold to render it. I use a vRamp for opacity to transparent the tip of the hairs . but when I use uparamcoord and vparamcoord for texturing the hair I lost v uv coordinate of the hair mean my ramp goes across the v of the model not the length of my hair strands.
is there a way to smooth the tip of my strands when I use uparamcoord and vparamcoord?
hey man, another question, do you know how to access painted attributes from VrayUserScalar, just like accesing parent_s and parent_t, but with custom attributes.
hi
how can i add sequence image to a texture node and then connect that to another node as a attribute ?
tnx
Hi Bjorn, is it possible to control clumping with a texture node ? I found nothing about. Regards
Hi Christian,
Yes you should be able to connect the clumping node up to the output of the texture node which is getting it’s information from a map. I should have a tutorial on controlling groom with maps.
Thank you. It looks like i need to learn more about custom attributes etc. -regards
DO YOU KNOW HOW TO RENDER YETI IN RENDERMAN FOR MAYA?? I DONT SEE THE FUR IN THE RENDER
Hi Bjorn, I was wondering if you had any tips as far as workflow with working on a mesh that is not set in stone.? I know you can use texture reference objects to transfer your groom to a deformed mesh, but is there a way to completely transfer the hair and guides over to a new mesh with the same topology, and then keep working on it? -Thanks
hi i am ramesh, i gone through with your tutorial about clumping with attribute, i am using maya 2015, your procedure does not help me in 2015. kindly check it for me.
Hi Ramesh, if you are having trouble it may not specifically be your Maya version, but it could be that you have a newer version of Yeti as this toturial was recorded some time ago. I am unable to check for you but please do share on the page if you figure it out!
Hi Bjorn,
I’m running Yeti on Mac. I can’t open Yeti graph editor due to this error: pgYetiGraphPanel.mel line 237: Could not find UI element named “”.
Have you ever encountered this problem?
Did you find a solution for this? 🙂
Hello,
I am are creating a bird which is going to have few shots of animation (including wing fold).
In wing fold position the Yeti feathers are not following guide curves properly specially on carpal joint and elbow area
(messing up against influence of guide and twisting ) but it follows groom well enough to do with longer shots not enough for closer shots.
We are using guide curves just because we have wrapped them on proxy skinned mesh & primitive feathers.
Tried another way to give custom aim attributes and animate particular area using guide curves but it is too much time consuming
to stack feathers each time in each shot.
Could you please help me to overcome this problem.
Best,
Mangesh Awate
For something as complex as wing folding you almost have to almost dictate each feather position manually. If you are having trouble with the guide curves twisting or misbehaving in other ways when you fold the wings I would suggest driving the curves with a rig or geometry, that you can better control.
For instance you could have a blendshape for the wing feather geometry placing the wing feathers in the right spot when the wing is folded up. Driving each curve in the right way when you fold a wing is a very complex task, so try to simplify it as much as possible. It may not be the best solution to have the wing feathers remain dynamic once the wing folds, they get packed quite tight and their behavior changes. To avoid sim artefacts and bad folding I would drive them wihout sim at that stage.
Thanks Bjorn for your guidelines. Blendshapes for a primitive feathers along with yeti guide curves sounds great and will give me full control over stacking.
Thanks again
Hi bjorn,
I tried importing Groom in an animated scene as it shows in your tutorial but i get error “yeti Reference object for isn’t valid, it should be a mesh but is actually a kTransform, defaulting to NO reference object.” But the groom actually imports and moves correctly with animation but i get this wierd effect…it looks like the hair seeding keeps changing,but i dont know if the previous error is the actual cause of the problem?
Can you help me with that please?
Yes it sounds like your reference object is not right. It should be the neutral mesh in the pose and place that the groom was created in. If it’s not there you will get problems when the hero mesh is animated. The error you are getting is the direct reason for the fur sliding around, because the mesh points are moving around, but the folicles are fixed to the mesh in the first frame, so for them to be moving ‘staying still at original position’ relatively, they need a reference object to be able to calculate the difference in position.
You should try to export the mesh from your original grooming look dev scene as a clean mesh only .OBJ that you can then import or reference into your render scene and hoock up as a reference object.
That should work.
Thanks a lot for your reply Bjorn. but I am having trouble finding the original pose that i groomed the hair because i think i moved some controllers when i was grooming for some reason, But theoretically if i opened the animation file & keyframed the T-pose at the start and redid the hair with the groom all over again, i won’t get the hair sliding problem when i play the animation ?
So i made a brand new file with just the model and i made simple yeti node + simple groom, then i applied a bend deformer then cached the hair simulation, and i still get the same problem. the groom doesnt follow the model too. i am sorry if i am bothering you man, it’s just that there is no resources online to help me with my problem
I am pretty sure that if it happens as you move or animate your model, then it’s because you need a reference object sitting in the neutal position of your mesh. If it happens to your sim even when the mesh is still, then I don’t know, you must have keys on something. Make sure that you don’t have autokeying on.
I’ll check that and try again, Thanks a lot for your help Bjorn
I`m getting this same problem, and this is the only topic I found in internet about it.
I tried everything I could but the same error persists. Did you solved this issue @islam fouda?
hey
thanks for the tutorials, all are very useful, can u please guide us with the arnold shading network for feather shading tutorials.
Hi blaabjergb,
Thanks for your sharing.I have a pb: i try to transfer a groom to another same topology model with this process : i wrap texture ref objet on my body and the i blenshape it with a less scale one .but my groom don’t follow good the topology position between too version .do you have any solution to fix that please. Thanks
Loic
Hi David, when working with grooming and hair my advice is always to stay away from scaling. If you do change the model just make sure that the topology is identical or close, and also make sure that the uv-map is as close as possible to the old model.
Hi Blaabjergb,
Help me, i have this problem? What should i do?
// Error: [curves] Eyebrows_YetiShape_|Eyebrows_Yeti|Eyebrows_YetiShape|Groom_EyebrowsShape_fur: invalid number of points on curve 395 (found 3, expected 4 or 5) //
It looks like your curves have too few points. Either you need to change a setting in the groom or you need to rebuild your curves with more points.
hi, I have a displacement map, and i give it for my character by arnold displacement shader, its cool. bot after yeti fur, fur dont seen anywhere. HOW TO USE DISPLACEMENT MAP IN YETI?
Hi Blaabjergb,
I’m evaluating Yeti for a future production and I’ve been following along reading your very helpful tutorials on your website. I’ve run across a simple problem and I feel so stupid, but I can’t for the life of me figure it out. I am hoping you can help me. My groom is halfway decent for a first timer, but when I try to simulate it with a simple animation on a figure, I find that the groom doesn’t follow the rotation of the figure’s head. No matter what I try, parenting, parent constraint, or orient constraint, I can’t get the groom to animate and the hair strands are deforming in an odd way because of it. Do you know what I am doing wrong? Thanks for taking the time to read my question.
Regards,
Jimmy
Hi Jimmy, I am not sure what your problem is, but did you create a texture reference object for your animated mesh?
No. I didn’t. I didn’t think it was necessary because I was still just in the initial grooming phase. I will try it. Thanks for you quick reply.
Hello Bjorn,
Firstly thank you for taking the time to create these tutorials. Instead of using Yeti I’m using nHair. I’m trying to achieve the same result when rendering nHair (as per your tutorial his tutorial explains how to apply a texture map to a shader and then apply the shader to the yeti node “the fur”.
I also show the settings i usually play with when using V-Ray as my render engine.).
However the shader does not seem to work.
I can’t seem to put images into this post so if you would like to see my working it mirrors yours from the tutorial.
I currently do not have Yeti so am using a work around with nHair however i am unable to get sections of the hair to be a specific colour.
If you can help in any way it would be highly appreciated.
Kind regards,
Matthew.
Hi Matthew,
I haven’t recently used either nHair or VRay in rendering. I used to…
nHair is very different from Yeti, so the methods I use in my Yeti tutorials does not apply at all to nHair I am sure.
You probably need to look up nHair Shading attributes.
Hello,
That’s a shame but thank you for the swift reply and thank you for the advice, I’ll keep looking.
Ta again!
Hey blaabjergb, don’t know if you still follow these. But is there a way to control fur density through attributes instead of density texture. Worked in a place that had an inhouse tool that did that. Xgen lets you do that as well. If i make an attribute and pump it into scatter node it doesn’t recognize it as a valid input.
Cheers
Hi, do you mean the the folicle density? You can put expressions into attributes on the xgen node, but there is not a lot of documentation about it and I haven’t been doing too much experimentation with that in particular. If you find a good way to go about it I would love to hear about it.
sorry I was unclear, i meant is it possible to use an attribute in Yeti, to spawn less folicles where the attributes are painted dark and the maximum amount where they’re painted white. I know i can do that with an image, but if i have long fur and short fur in a single groom i want to spawn less folicles where hairs are long and don’t wanna alt tab to a different program to projection paint those masks if I can jsut paint a yeti attribute to the same effect.
Cheers
Xgen live lets you do that pretty easily
// Error: line 1: initializePlugin function failed (pgYetiMaya)
hi blaabjergb,
can you explain how to connect displacement map with yeti graph, in maya 2018 yeti, with arnold render.
i did but did not get any difference.
if you explain with a video tutorial will be much helpful.
thanks
Hi Bjorn. I work following your tutorial but when i rig and animat has done then my fur is not following to the object and i can not fix this. 😦
Hi Nhat, for your groom to follow the mesh you need to make sure that you created a texture reference object on your groomed model. Or you need to hook it up to the cached geo.
I have already done this step. I tick into overide cache and then I move my object it did not follow =(
hi friends. after importing texture refrence object into scence when i want to connect message to refrence object i can not find refrence object in outputs. where it is?
hi ,
I am using curve grooming for creating long hair ..Once rigged and rendered in lighting animation file we found some weird hair movement ..Dont know why its coming as its my first time grooming using yeti …Can someone help let me know the possible reasons of the movement
Hi Jasdeep,
If you sim the curves it’s a good idea to cache it before you render, and that way you can also check for artefacts before you put it through lighting.
If your topology or uv’s are a bit odd, then the hair curve follicles may not behave correctly when the mesh is deformed if they are constrained to the geo using the classic method of follicles.
Cache everything and check them to try to isolate where the problem happens. It’s most likely in the sim or curve animation.
Hi blaabjergb,
Thanks for the quick response . Will check the above mentioned and get back to you if any issues . Just an update , here i am getting the movement in head hair that is static and has no simulation or curve animation to it . Its directly replacement of anim file with lighting file and render .We are directly rigging the curves that were used to generate hair in yeti.
hi blaabjergb,
can you explain how to connect displacement map with yeti graph, in maya 2020 with redshift render