This first tutorial goes through the process of creating a fur and groom using peregrine labs Yeti plugin for Maya. I am describing step for step how to go about setting it all up.
In this second tutorial i explain how to make your fur system clump when you have a groom attatched.
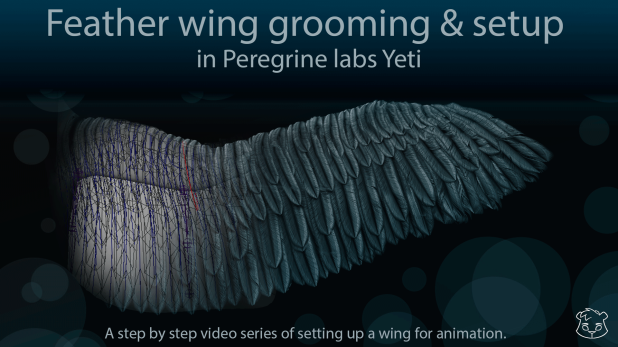
I created a simple and straight to the point tutorial series on making a feathery wing.
Check out the details below:
Basic walk through of a few nodes:
This tutorial goes through instancing and creating a feather coat:
This tutorial shows how you can set bounding objects to control of fur should grow or not:
This tutorial goes into controlling a groom through a texture map:
This tutorial goes through setting up your simulation:
This is how to export and import a groom in Yeti
This tutorial explains how to control your hair with a guide curve while animating the mesh.
This tutorial explains how to apply a texture map to a shader and then apply the shader to the yeti node “the fur”.
I also show the settings i usually play with when using V-Ray as my render engine.
This old tutorial was brought back due to a request, it shows how to cache your yeti simulation out.

Pingback: Rajak - The Gentle Giant
hi! is it possible in yeti to export stand-in in one frame and only overall transformation data for each frame?
as alembic does – it can determine which shape could be exported without writing its components data per frame
Yes you should be able to translate a groom around, for instance a short haircut on top of a head without having to sim it. The moment you don’t need sim, you can just translate it around and even avoid caching it if it’s just short fur deforming on a creature.
It of course can have an effect on your specific render engine and possibly motion blur, but I would say try to test it out.
hi again! thank you very much for your time!
can you please give a tip, how to stop some hairs that uses scraggle with pick() expression from flickering?
sorry for bothering you again!
There could be multiple reason why it would flicker if the geo is deforming. If it flickers on static mesh then make sure that the expression isn’t affected by anything that changes value over time or is time dependent. A rand command could be time sensitive depending on which one you use.
these tutorials are great! in the latest version of Yeti, in the I/O section there is no ‘groom’ in the dropdown, just ‘none’ and ‘cache’. I assume ‘groom’ was rolled in with ‘cache’? I ask because even after connecting the texture ref object under the connection editor, my groom will not bind to the animated asset.
Hi Bjorn! Hope you doing well!
I’m with new headache xD
We have character being in the water, his hairs is partially submerged and that part should be colored accordingly and preserved that state even if it puts out of the water, hair system is built with guides.
If we create and animate attribute that stores u param on guides how could we able to read and transfer it onto hairs to tell shader where that blending point.
Could you please point right way of shading it? Maybe there other ways of doing it, that’ll be awesome to hear it!
And again thank You!
Oh yes, we shading it in arnold.
Oh, that’s tricky, I haven’t done specifically that.
The easiest way would probably be to animate the texture of the fur so that you blend the fur shader with a darker “wet” colour where the water has hit.
You could use same texture sequence to animate the clumping and other attributes giving the wet effect.
I am thinking a black and white map that is roughly animated to match the character in the anim scene. You could potentially paint this directly in Maya.
I don’t think there is an out of the box method for dynamically and automatically generating an influence field or map from volumes.
The easiest would be a black and white image sequence masking the parts of the character that gets wet. It would be shot based and locked to anim, but probably the simplest method.
how is it possible to color half of the hair’s length wet and other is dry? is there some shader based on curves u coordinates?